1.查看系统信息
cat /proc/version
2.查看CentOS版本信息
lsb_release -a
3.更新yum源,替换默认yum为163镜像,原因是国内163镜像会快一些。
还有一个原因是域名安装是出现无法找到资源的情况
“The requested URL returned error: 404 Not Found” Trying other mirror.
具体步骤是:
cd /etc/yum.repos.d               #打开repo目录
mv ./CentOS-Base.repo ./CentOS-Base.repo.bak     #备份原基本源
wget http://mirrors.163.com/.help/CentOS6-Base-163.repo  #下载163的源文件
mv CentOS6-Base-163.repo CentOS-Base.repo  #将163源改为默认源
yum clean all   #清空yum缓存
yum makecache   #生成yum缓存
4.安装apache 服务
1、yum命令安装apache
yum install httpd
根据提示输入 y 或 n, 一般一路 y 同意就OK了。
2、配置apache
打开apache配置文件httpd.conf
vi /etc/httpd/conf/httpd.conf
将#ServerName www.example.com:80 改为自己的服务器名、保存退出,如:
#
#ServerName www.example.com:80
ServerName www.orhonit.org
3、启动apache服务
service httpd start
设置开机启动
chkconfig --levels 235 httpd on
访问服务器IP地址,看看是不是已经可以访问了。
5.安装mysql 5.5
1.在centos6.x上安装mysql5.5 ,首先添加yum源。
Webtatic EL6 for CentOS/RHEL 6.x
rpm -Uvh https://dl.fedoraproject.org/pub/epel/epel-release-latest-6.noarch.rpm
rpm -Uvh https://mirror.webtatic.com/yum/el6/latest.rpm
如果已经安装了早期版本的mysql(查看命令rpm -q mysql mysql-server ),可以用下面的办法升级:
yum install mysql.`uname -i` yum-plugin-replace
yum replace mysql --replace-with mysql55w
如果未安装就直接运行下面的命令进行安装
yum install mysql55w mysql55w-server
You should upgrade existing tables before setting the server to become a production machine, which can be done by starting the server and running the mysql_upgrade script (this may take time depending on the size of the database).
service mysqld start

# This will issue a password prompt for the user. If you don't have a root user password, remove the "-p"
mysql_upgrade -u root -p
2、设置开机启动
chkconfig --levels 235 mysqld on
3、设置root密码
mysqladmin -u root password '********'
4.root登录
mysql -u root -p ( press enter )
Enter password:(root密码)
Enter password:
Welcome to the MySQL monitor.  Commands end with ; or \g.
Your MySQL connection id is 3
Server version: 5.5.47 MySQL Community Server (GPL)

Copyright (c) 2000, 2015, Oracle and/or its affiliates. All rights reserved.

Oracle is a registered trademark of Oracle Corporation and/or its
affiliates. Other names may be trademarks of their respective
owners.

Type 'help;' or '\h' for help. Type '\c' to clear the current input statement.
mysql> exit; 退出mysql命令行。
6.安装php
1、添加yum源
CentOS/RHEL 6.x:
rpm -Uvh https://dl.fedoraproject.org/pub/epel/epel-release-latest-6.noarch.rpm
rpm -Uvh https://mirror.webtatic.com/yum/el6/latest.rpm
CentOS/RHEL 7.x:
rpm -Uvh https://dl.fedoraproject.org/pub/epel/epel-release-latest-7.noarch.rpm
rpm -Uvh https://mirror.webtatic.com/yum/el7/webtatic-release.rpm
2、运行安装命令,安装php5.6
yum install php56w php56w-opcache
3、如果之前安装了低版本的php则需要安装插件来升级php;
yum install yum-plugin-replace

yum replace php-common --replace-with=php56w-common
7.安装phpMyadmin
phpmyadmin是可以全手动安装的(即下载压缩包进行配置安装),但是非常繁琐,很容易出错,所以推荐用yum命令进行安装。
首先确定yum源里有phpmyadmin安装包,默认yum源里应该是没有的,epel是应该是应用最广泛的yum源,查看epel源的phpmyadmin信息:
yum --enablerepo=epel info phpmyadmin
安装phpMyAdmin
yum install phpMyAdmin
安装完成以后重启apache,浏览器访问phpMyadmin。
service httpd restart
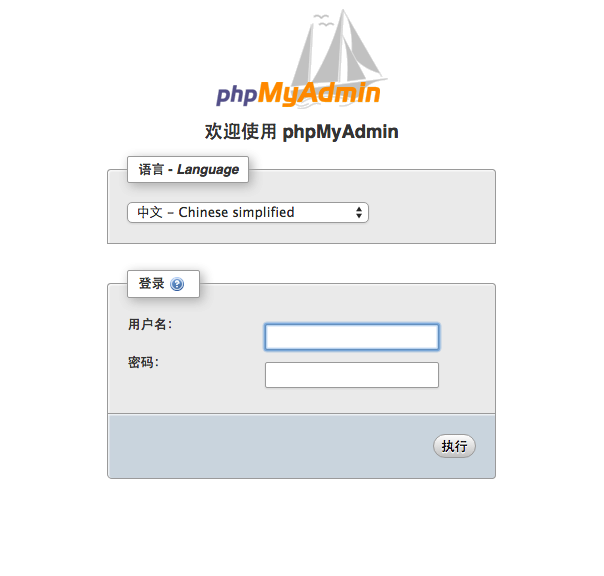
打开浏览器访问http://服务器IP/phpMyAdmin ,出现如下图所示说明安装成功。
如果出现403 Forbiden,在phpMyAdmin的配置文件中添加访问权限为Allow from All ,如下:
<Directory /usr/share/phpMyAdmin/>
   AddDefaultCharset UTF-8

   <IfModule mod_authz_core.c>
     # Apache 2.4
     <RequireAny>
       Require ip 127.0.0.1
       Require ip ::1
     </RequireAny>
   </IfModule>
   <IfModule !mod_authz_core.c>
     # Apache 2.2
     Order Deny,Allow
     Deny from All
     Allow from 127.0.0.1
     Allow from ::1
   </IfModule>
   Allow from All
</Directory>
为了安全起见,一般会将phpMyAdmin地址改成自己要设置的简写如dbadmin等,方法如下:
打开phpMyAdmin配置文件phpMyAdmin.conf
vi /etc/httpd/conf.d/phpMyAdmin.conf
将
Alias /phpMyAdmin /usr/share/phpMyAdmin
Alias /phpmyadmin /usr/share/phpMyAdmin
改成:
#Alias /DBadmin /usr/share/phpMyAdmin #此行无效
Alias /dbadmin /usr/share/phpMyAdmin
这样就可以用dbadmin 访问phpMyAdmin管理面板了。
http://服务器IP/dbadmin
8.其他
添加epel源
CentOS 6.x
rpm -Uvh http://download.fedoraproject.org/pub/epel/6/i386/epel-release-6-8.noarch.rpm
yum --enablerepo=epel info phpmyadmin
删除无效rmp源:
rpm -e epel-release
参考文献:MySQL 5.5 on CentOS/RHEL 6.7 and 5.11 via Yum
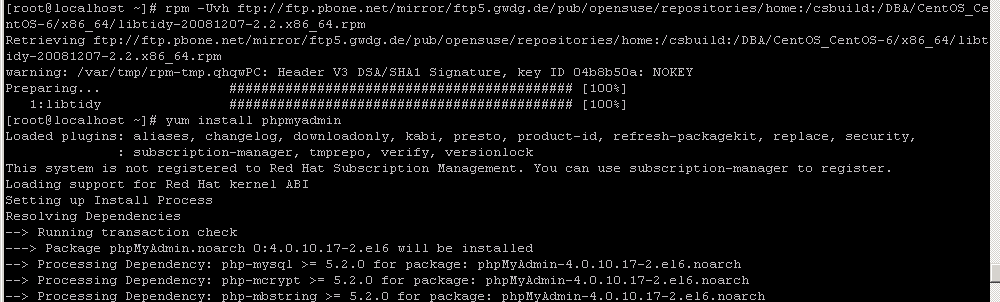
redhat 6 上安装phpmyadmin 时一直 报 libt1.so.5()(64bit) 和 libtidy 两个依赖项无法使用,如下
Missing Dependency: libt1.so.5()(64bit) is needed by package php-gd-5.2.17-1.el5.x86_64
Error: Missing Dependency: libt1.so.5()(64bit) is needed by package php-gd-5.2.17-1.el5.x86_64
You could try using --skip-broken to work around the problem
You could try running: package-cleanup --problems
                        package-cleanup --dupes
                        rpm -Va --nofiles --nodigest
The program package-cleanup is found in the yum-utils package.
解决办法是:
到 RPM资源搜索站 http://rpm.pbone.net/ 分别搜索libt1.so.5() 和 libtidy 找到对应的RPM下载链接安装到服务器即可。
根据自己的系统版本找到与自己的系统版本对应的, 如我的我的版本是centos/reheal 6 系列的,如下图:
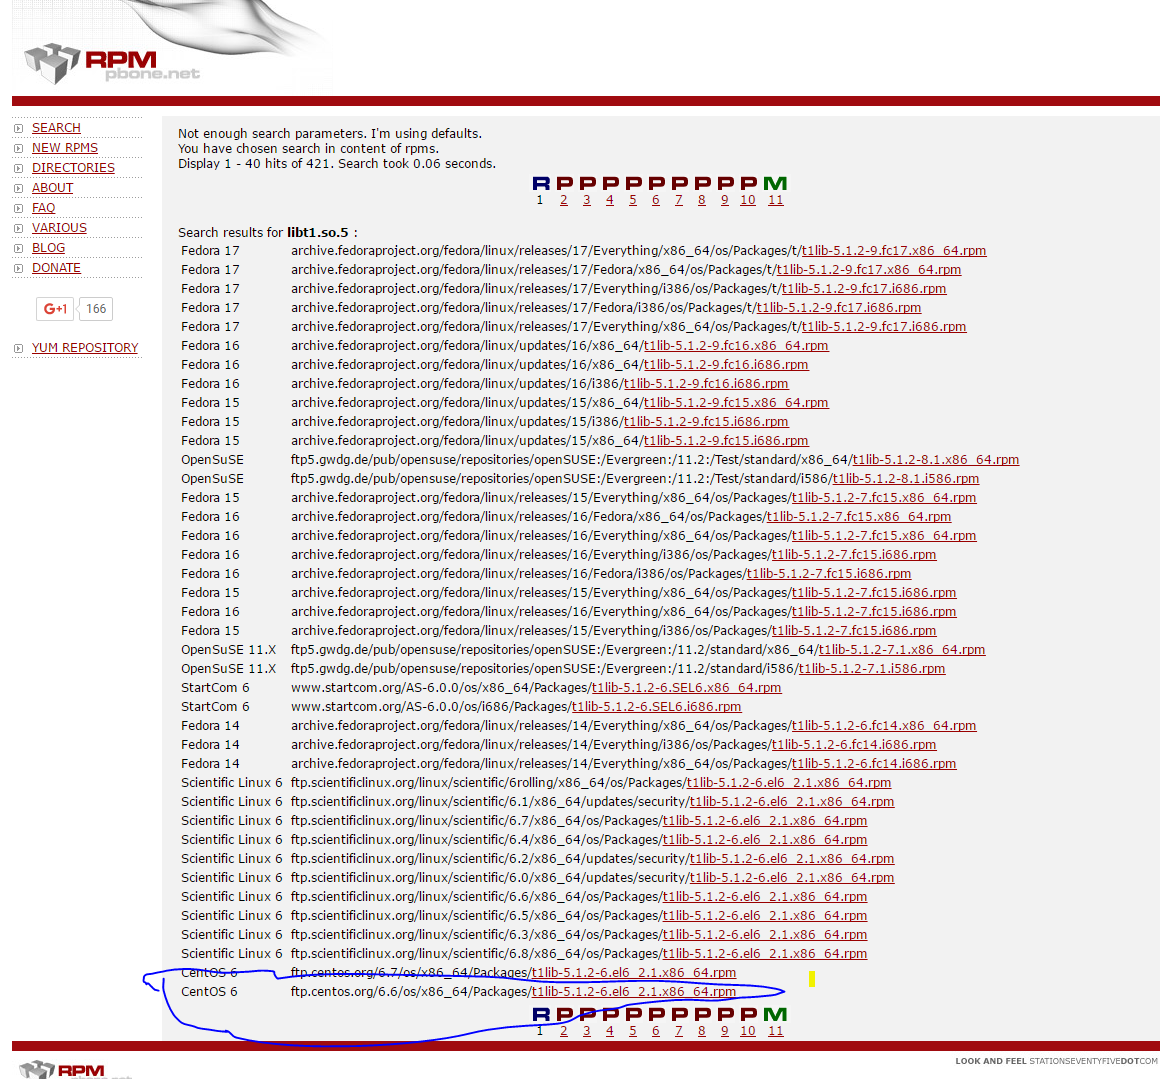
找到后点进去获取链接,从下载链接中找到一个可用的链接复制到服务器,进行安装即可。
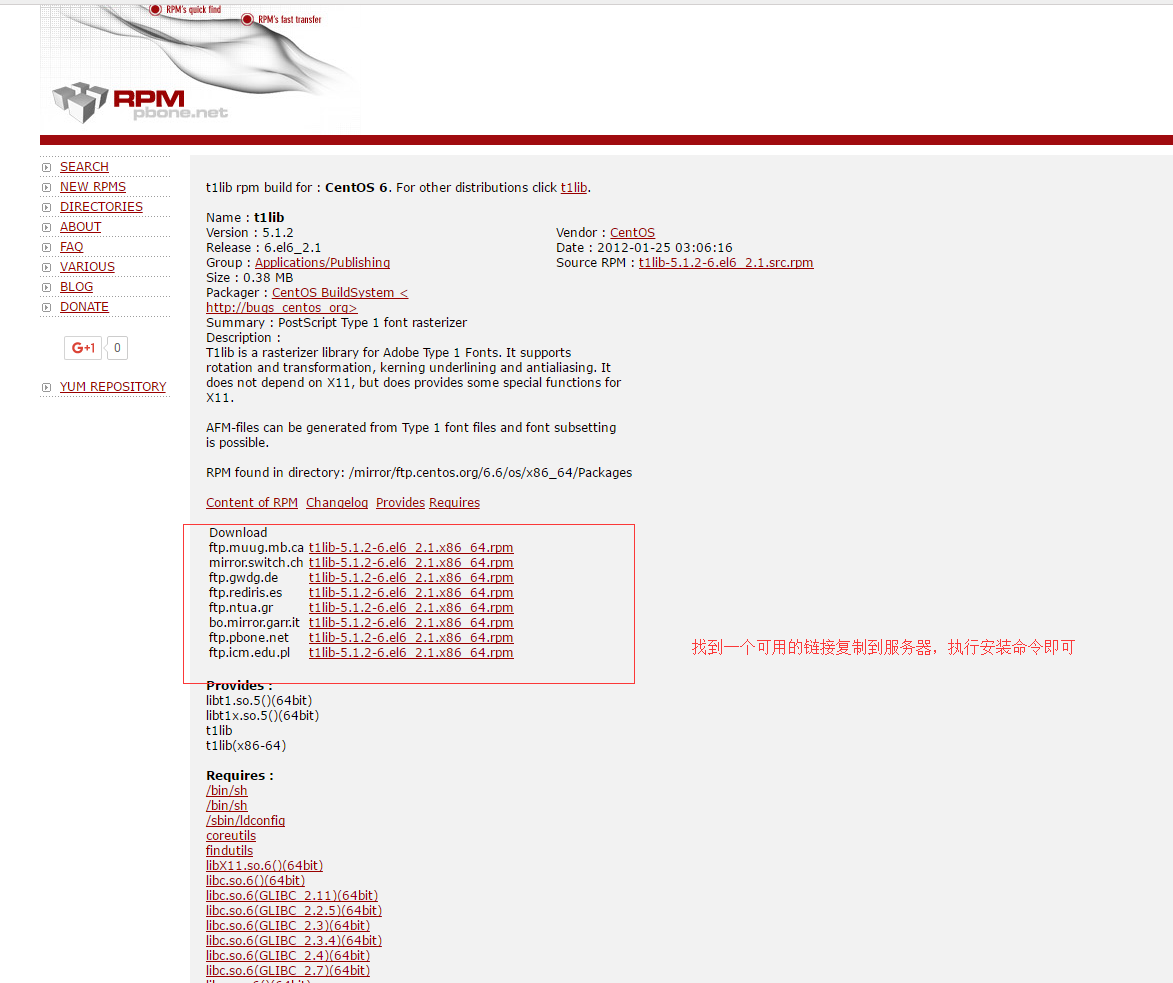
安装方法: 我的安装方法是下面这样的,经过测试可用、所以没有继续深入研究。
rpm -Uvh ftp://ftp.pbone.net/mirror/ftp.centos.org/6.8/os/x86_64/Packages/t1lib-5.1.2-6.el6_2.1.x86_64.rpm